Amazon Web Services deserve all the credit for beginning the age of serverless computing with the launch of AWS Lambda in 2014. Since its launch, Lambda functions have found innumerable uses in the field of File Processing, ETL, Data Analytics, deployment of web and mobile applications, and much more.
In this blog, you will learn to create and fire your first Lambda function. Conceptually, you will also learn about the basic configurations, the importance of event and context in a lambda function, and experience the AWS Lambda dashboard to not feel intimidated by it. All you need to have is an account on Amazon Web Services.
Benefits of using AWS Lambda
- No servers to manage.
- Better software development by decoupling architecture from code.
- 1 million free requests per month.
- Testing feature that allows for code validation before putting it in production.
Your first Lambda function
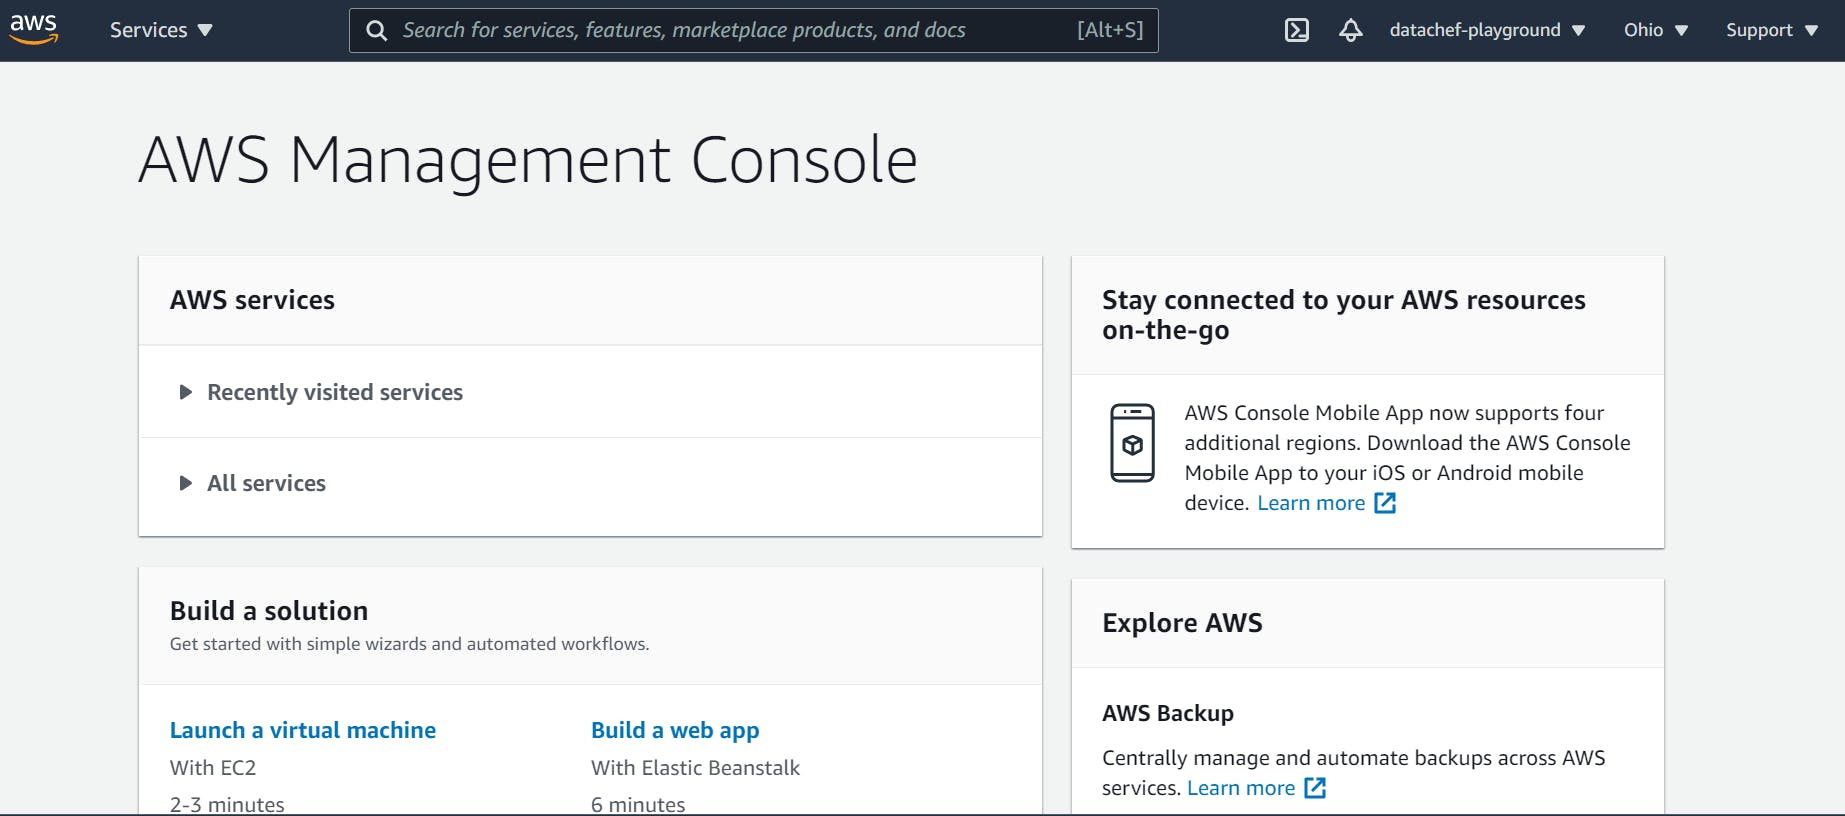
Once you have logged in to AWS, this is what your AWS console should look like.
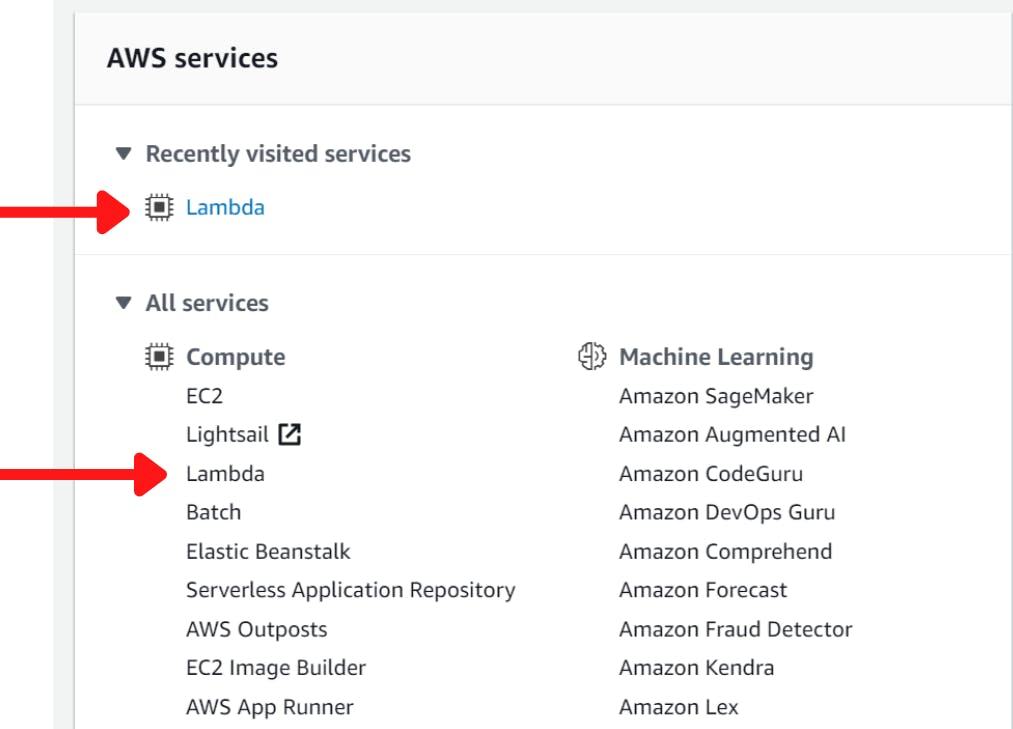
If you have used AWS Lambda before, it should appear in your Recently visited services else, just extend the All services dropdown and click on Lambda. This should take you to the AWS Lambda Console.
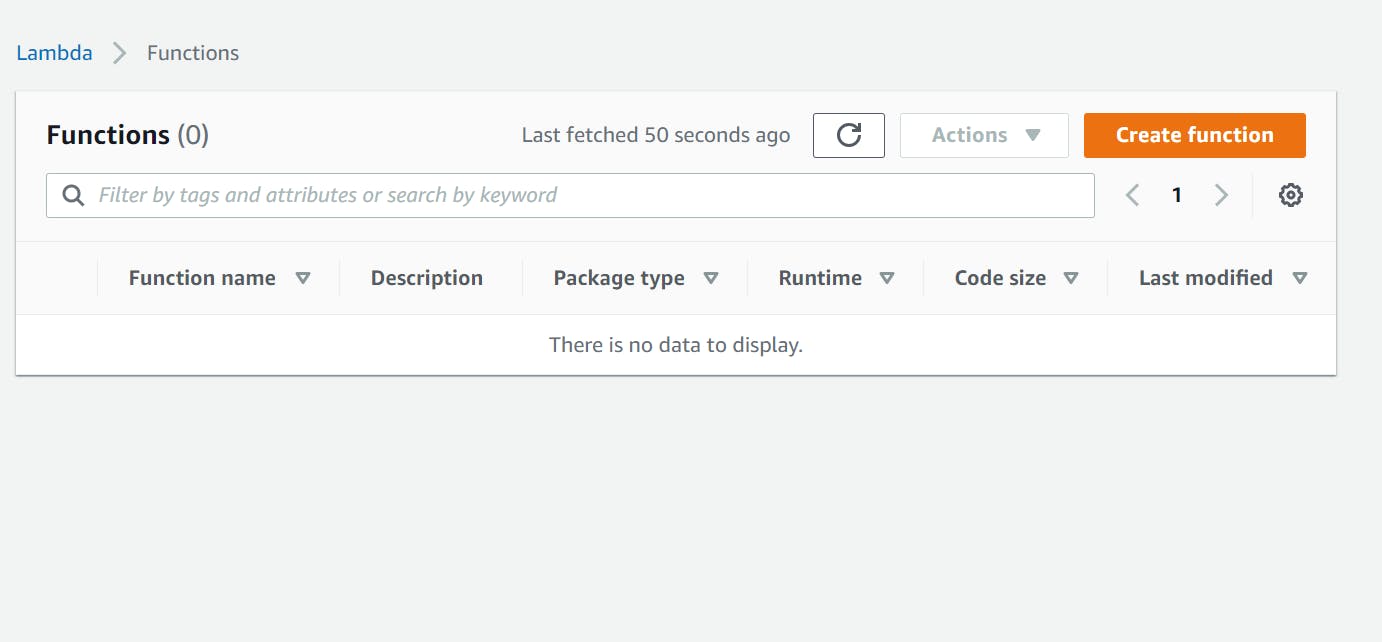
Once you are in the AWS Lambda console, click on the Create function button.
On the Create function page, you have to fill in some basic information about your Lambda function. For example:-
- Starting point for your function - For this article, we will create a function from scratch.
- Name of your function - Remember to use only letters, numbers, hyphens, or underscores with no spaces. Else you might see an error.
- Runtime - Which programming language you want to use to write your Lambda function? For this article, we will use Python3.8.
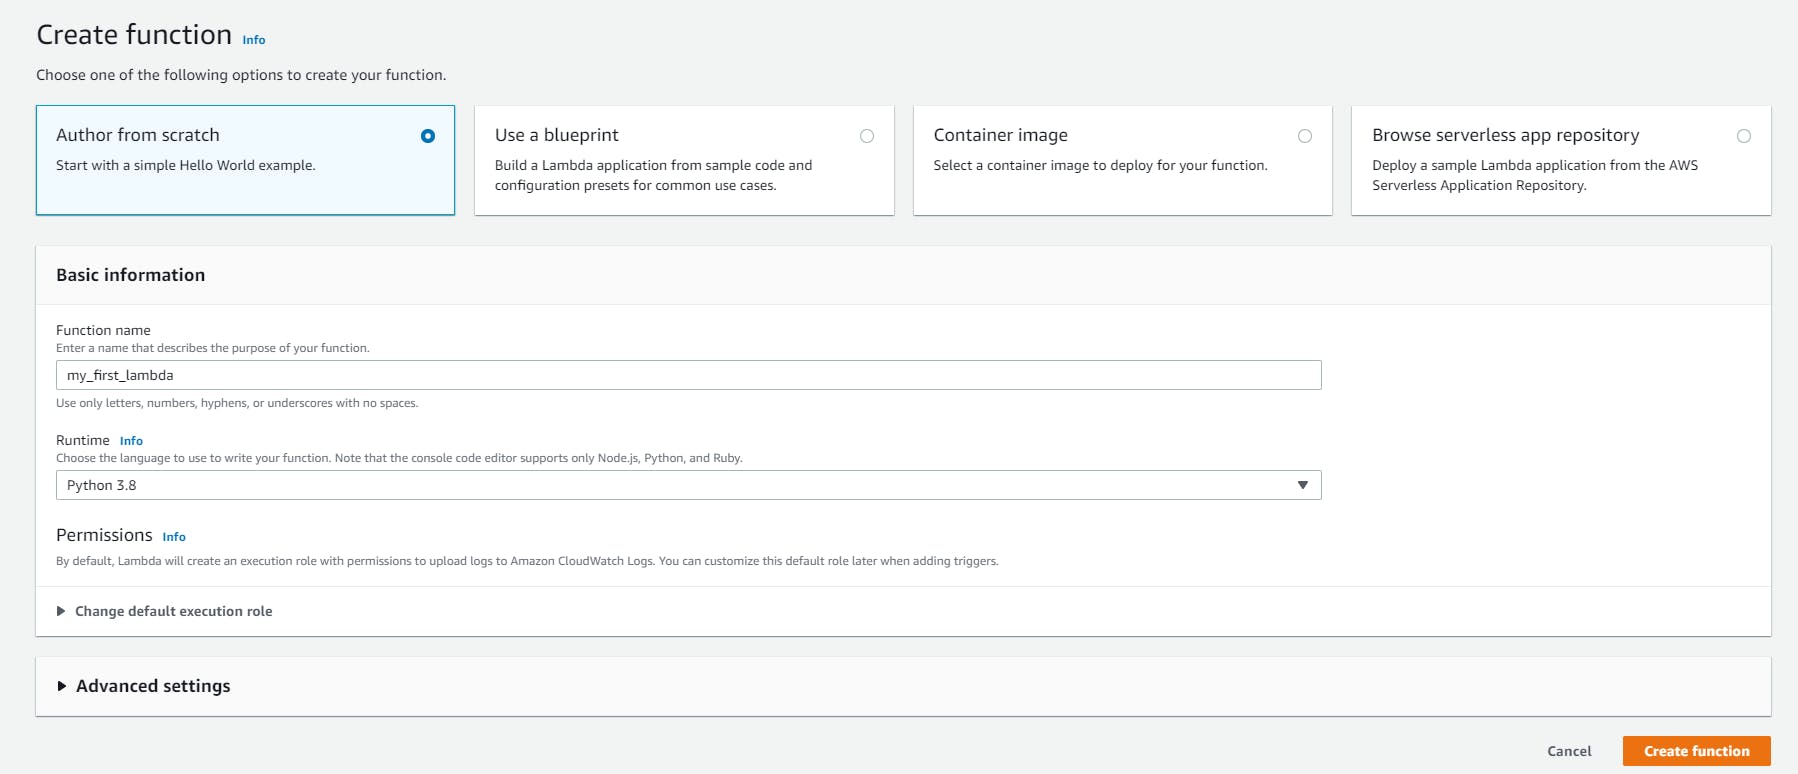
You will also see a few other things like Permissions, Change default execution role, and Advanced settings. Don't bother yourself with these settings for now. We will learn about them in future articles and videos.
Now press on Create Function. Within a few minutes, you should be redirected to your newly created Lambda function console.
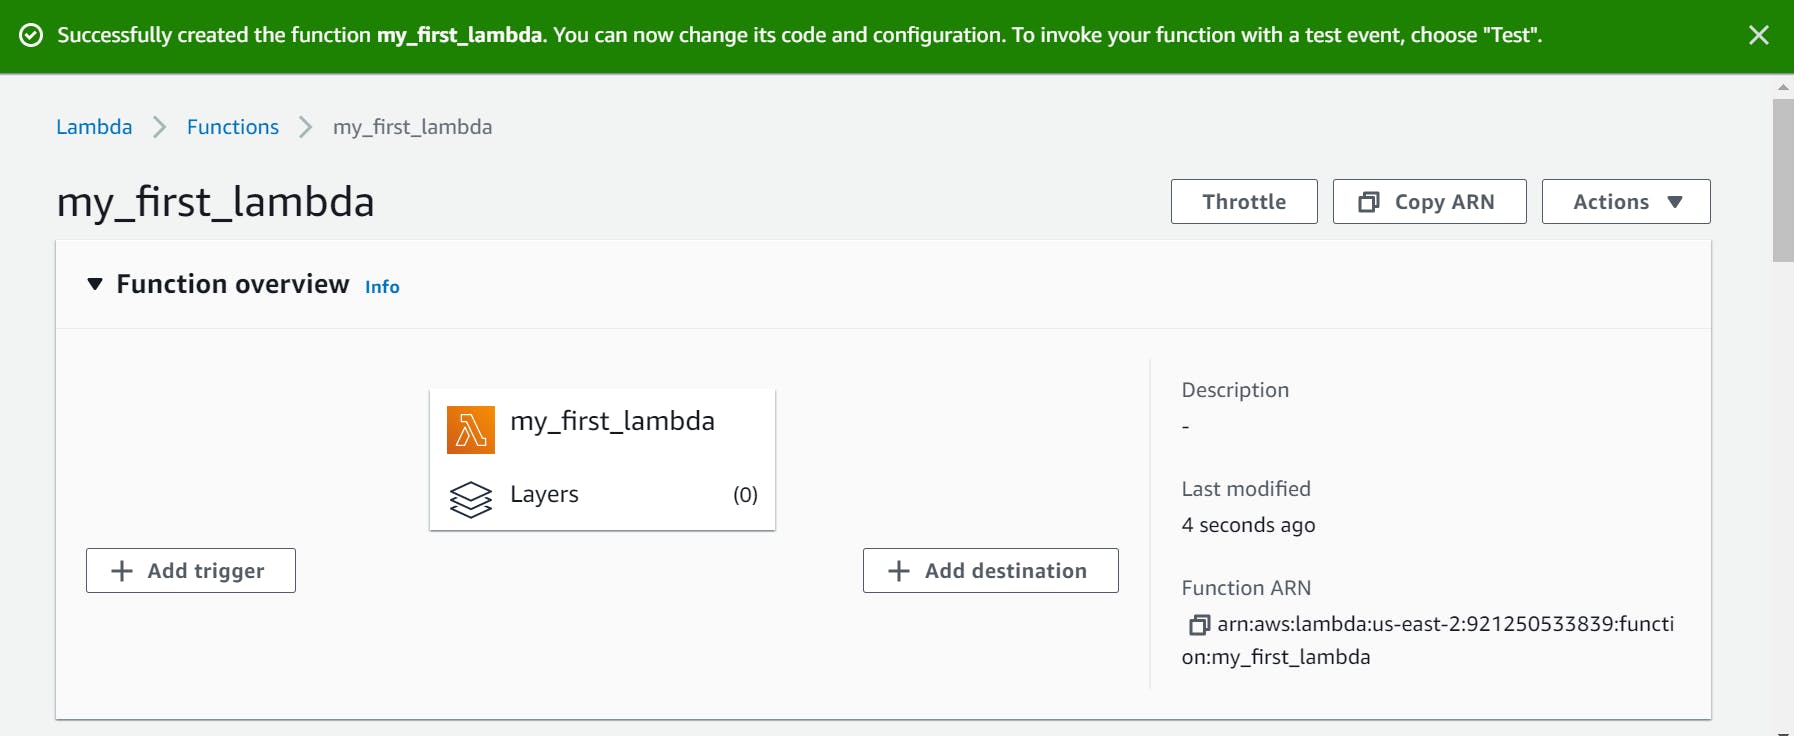
Now scroll down the code editor section.
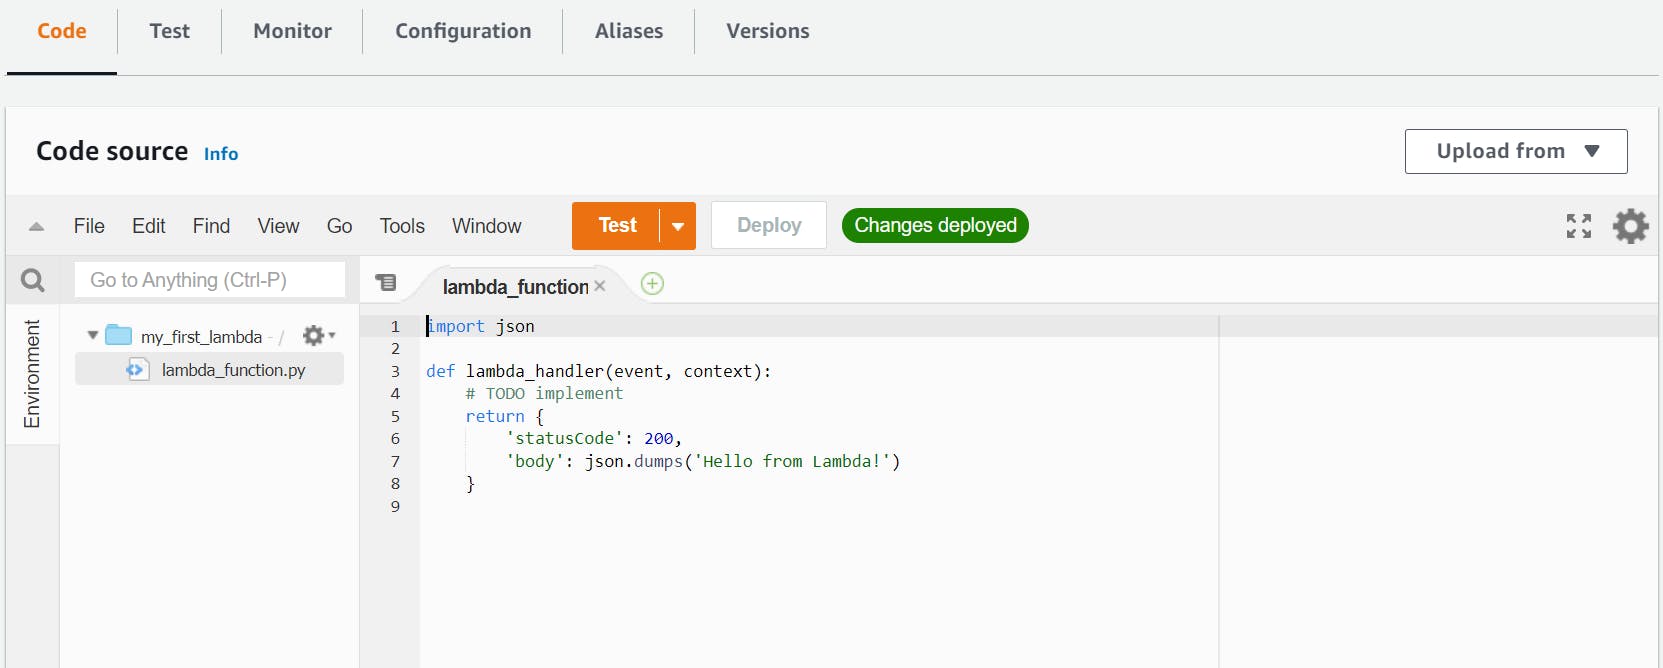
Carefully notice the name of the .py file and the name of the python function defined in it.
Filename - lambda_function.py
Python Function name - lambda_handler
This is the handler method that is invoked by AWS Lambda, every time it is triggered. You can confirm this by scrolling further down to the Runtime settings section.

So if you were to change the name of the function or create a different file to hold your function, you need to update them in the Runtime settings.
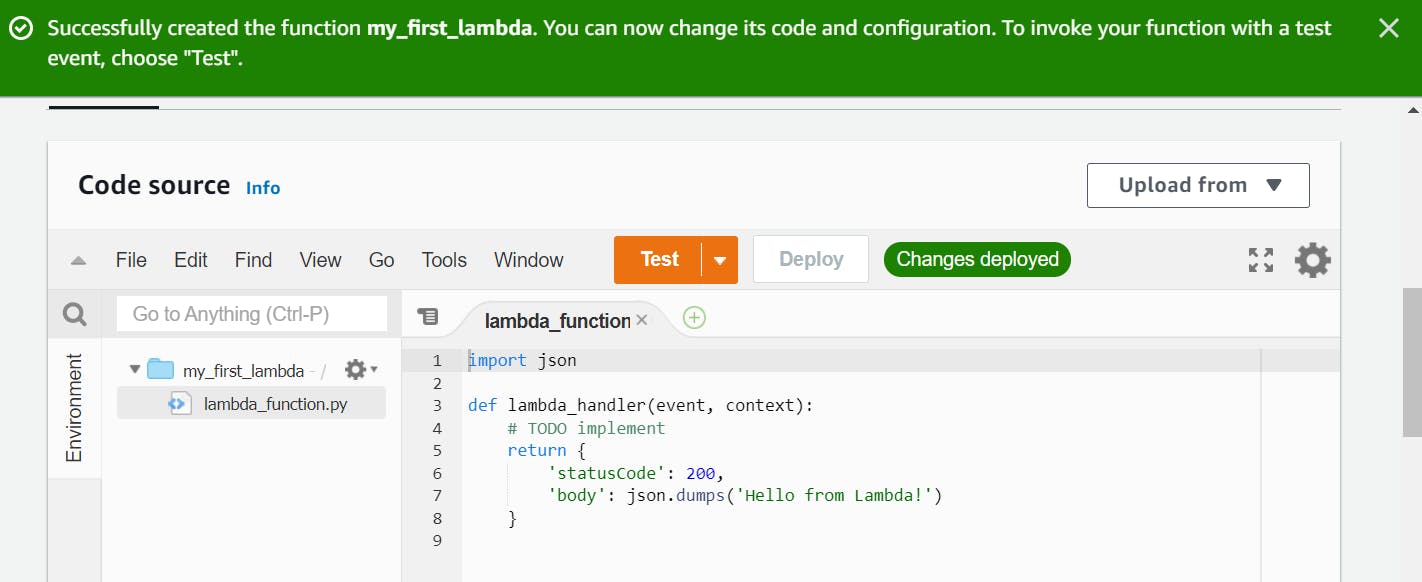
As you can see, there is already a placeholder code in our lambda_function.py inside the lambda_handler function. Let's just try and run it as it is. Press on the Test button.
You will be asked to Configure test event. A test event is a way of mimicking a real event that will act as an input to your Lambda function in the form of a JSON payload. The test events are a great way to validate your Lambda function, before putting it on production. You can choose any event you want to mimic from the Event template dropdown list. In this article, we will use the simple hello-world template.
Replace all the key-value pairs in the JSON payload with some meaningful data. I am using my information in the payload. Then press on Create.
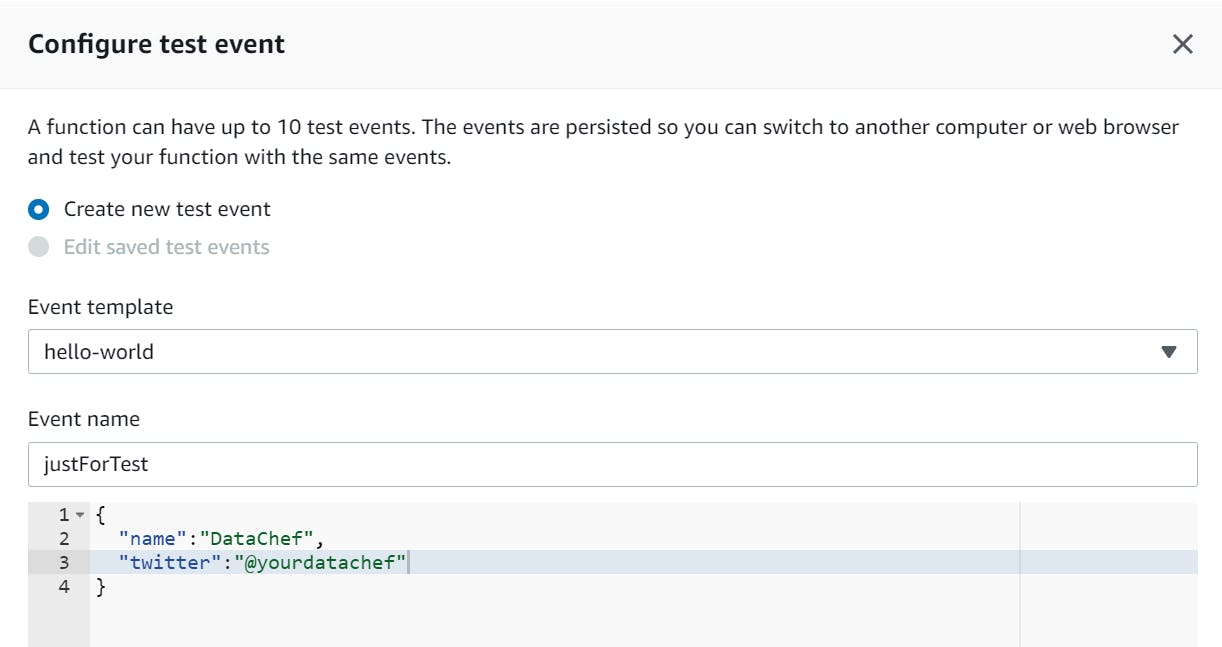
Once the test event is created, go ahead and press on Test again in the Lambda console. You should get a similar execution result.
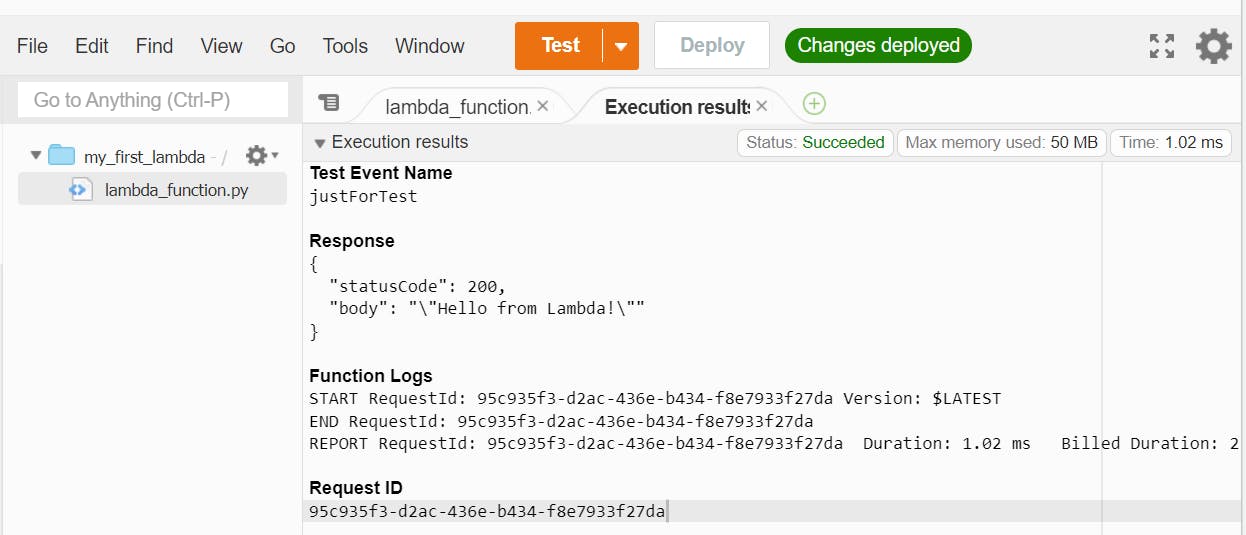
Congratulations! You have deployed your first Lambda function. It may not look like much, but believe me, it is the first successful step into the world of Serverless!
Significance of event and context in Lambda function
Let us inspect the execution result closely.
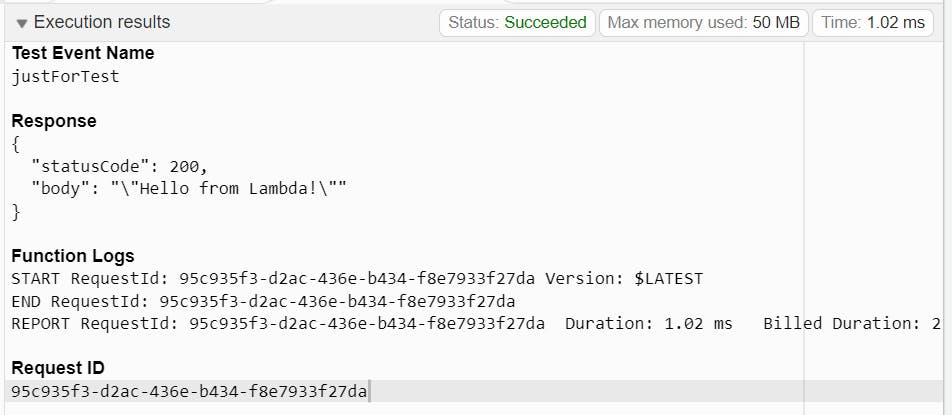
You can see the Test event name, Response, Function logs, and Request ID. Each of these metrics provides some information about your lambda function.
Look at the Response metric. It is basically the JSON payload that the Lambda function returns.
Response
{
  "statusCode": 200,
  "body": "\"Hello from Lambda!\""
}
But it is a very generic response code. Let's go ahead and personalize it. If you remember, we had changed the values of our JSON payload in our configured test event. Let's try to use that test event. How do you think, we can access that event?
The answer lies in the arguments passed into your lambda_handler function - event and context. Let us understand what they are.
When your Lambda function is invoked, event and context arguments are passed into the function. The event object contains the JSON payload that is to be processed by the function. Hence, the payload we created in our test event, is present in the event object. When passed into the function, the event is converted to a native data type - usually a dictionary(if you are using Python). However, it could also be list, str, int, float or the NoneType type.
The second argument is context. This object provides methods and properties that provide information about the invocation, function, and runtime environment.
You can verify these two arguments by printing them inside the function.
import json

def lambda_handler(event, context):
    # Newly added print statements
    print(event)
    print(dir(context))

    return {
        'statusCode': 200,
        'body': json.dumps('Hello from Lambda!')
    }
Since you have changed the contents of the file, you need to save it. Press on Deploy to save the changes in the file. Click on the Test button.
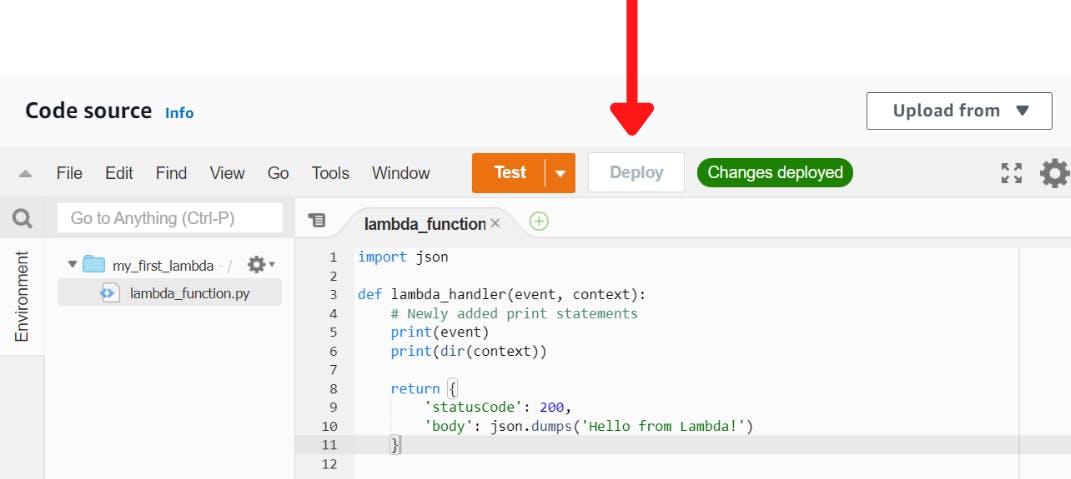
You should get a similar execution result.
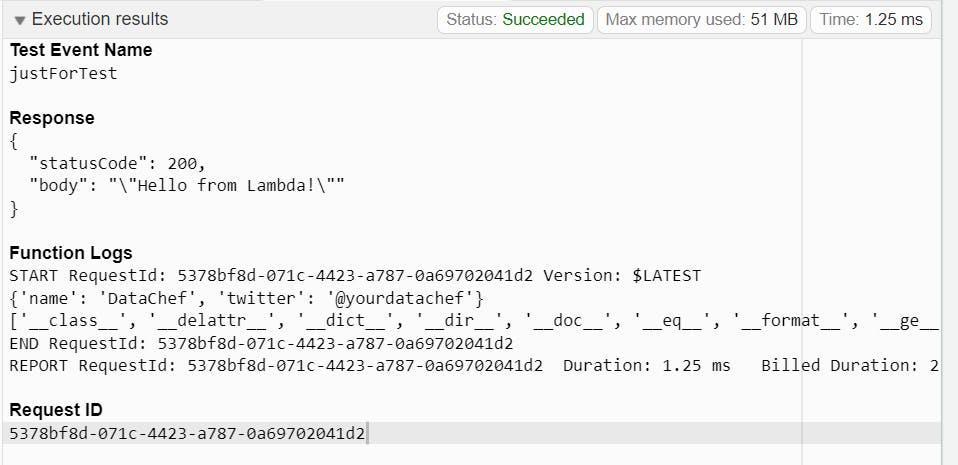
As you can see, the event object is returning the key-value pairs that we had mentioned in our test event. For the context object, we can use the dir() function to return all the properties and functions of the object.
Let us now use the event object to personalize the result of our Lambda function. Change the code inside the lambda_function.py to the below-mentioned code.
def lambda_handler(event, context):
    name = event.get("name", None)
    twitter_handle = event.get("twitter", None)

    return f"Welcome to {name}. "\
           f"Join us on Twitter - {twitter_handle}"
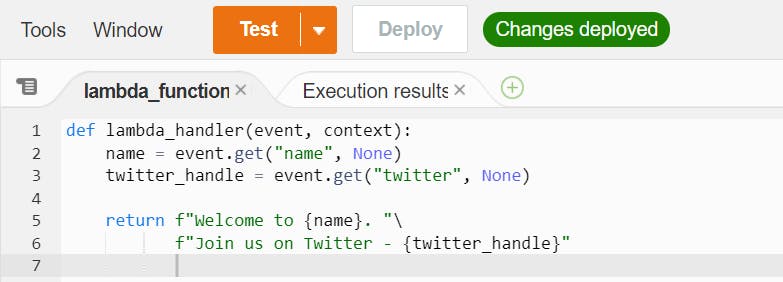
Click on Deploy to deploy the changes and then click on Test. You should see a similar execution result.
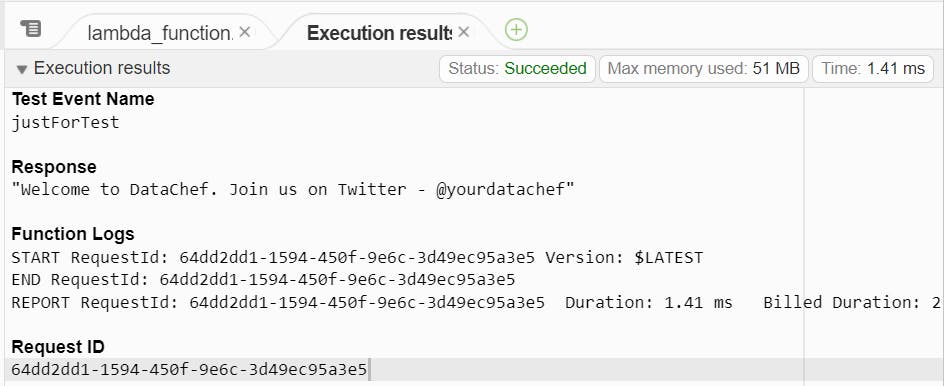
The Response metric now contains the newly returned statement using the data passed in the test event.
Hope you enjoyed this visual guide towards understanding and taking your first step towards understanding AWS Lambda. In future articles, we will slowly learn other features of AWS Lambda and perform some real-world applications to show you its advantages.
Our objective is to present important Data Engineering and Machine Learning concepts in a lucid format. For this purpose, your feedback is important! Do share what you like and dislike about the articles in the comment section.

